
But even without those things we're still pretty much ready to rock! I just love how it turned out! Here it is!


I know it's not the most original idea since birch tree themed nurseries are all over the internet right now but I just love how we decided to use a very dark, charcoal gray for the two walls with the birch trees on them and then a light gray for the other two walls so that the whole room wouldn't be so dark and feel too heavy.

Thanks to my mom and dad for purchasing the crib, changing table and shelves for us! I decided on using the Ikea Expedit bookcase on it's side with 4 inch legs added to the bottom for the changing table because it was more versatile and to me more interesting than a plain old changing table. Dave was unsure about it for awhile, especially since he loathes cheap Ikea stuff (I LOVE cheap Ikea stuff!) and especially because that meant we'd actually have to go to an Ikea, go inside and be surrounded by all the cheap crap he hates. But bless his heart he went along with my vision and we made the trip there (all the way to Pittsburgh, a two hour drive).


Once we picked the color scheme I searched the internet for matching sheets and a crib skirt but couldn't find anything that wasn't pastel blue, green or jungle lion/tiger theme. So after a little research I found this blog that shows you how to make crib sheets. I must say that it's actually pretty easy! The crib skirt I just winged it without a pattern. I measured the dimensions of the crib platform, the length of the drop to the floor and then cut the pieces to those sizes, adding a 1/4" for the seams. Using the mattress as a template I traced around it onto my base fabric for the skirt and then sewed the side pieces to those.

I decided to make a pennant to hang over the crib from the left over crib sheets and skirt fabric. Again, this is a super simple project. Just cut out whatever size triangles you want to use, leaving a 1/4" to 1/2" seam on the sides to allow for seams. After I ironed the seams over to make it easier to sew down I realized that I didn't even need to sew them at all so I just left them like that! Then I took a coordinating 1" wide ribbon, folded it in half and sewed each triangle between the ribbon, making it one long pennant.
The light fixture was originally an ugly 80's floral, frosted etched half dome globe that I just thought we'd replace with a plain, clear frosted one. Lucky me though, my husband is just as creative and innovative as I am and one day came home with this!
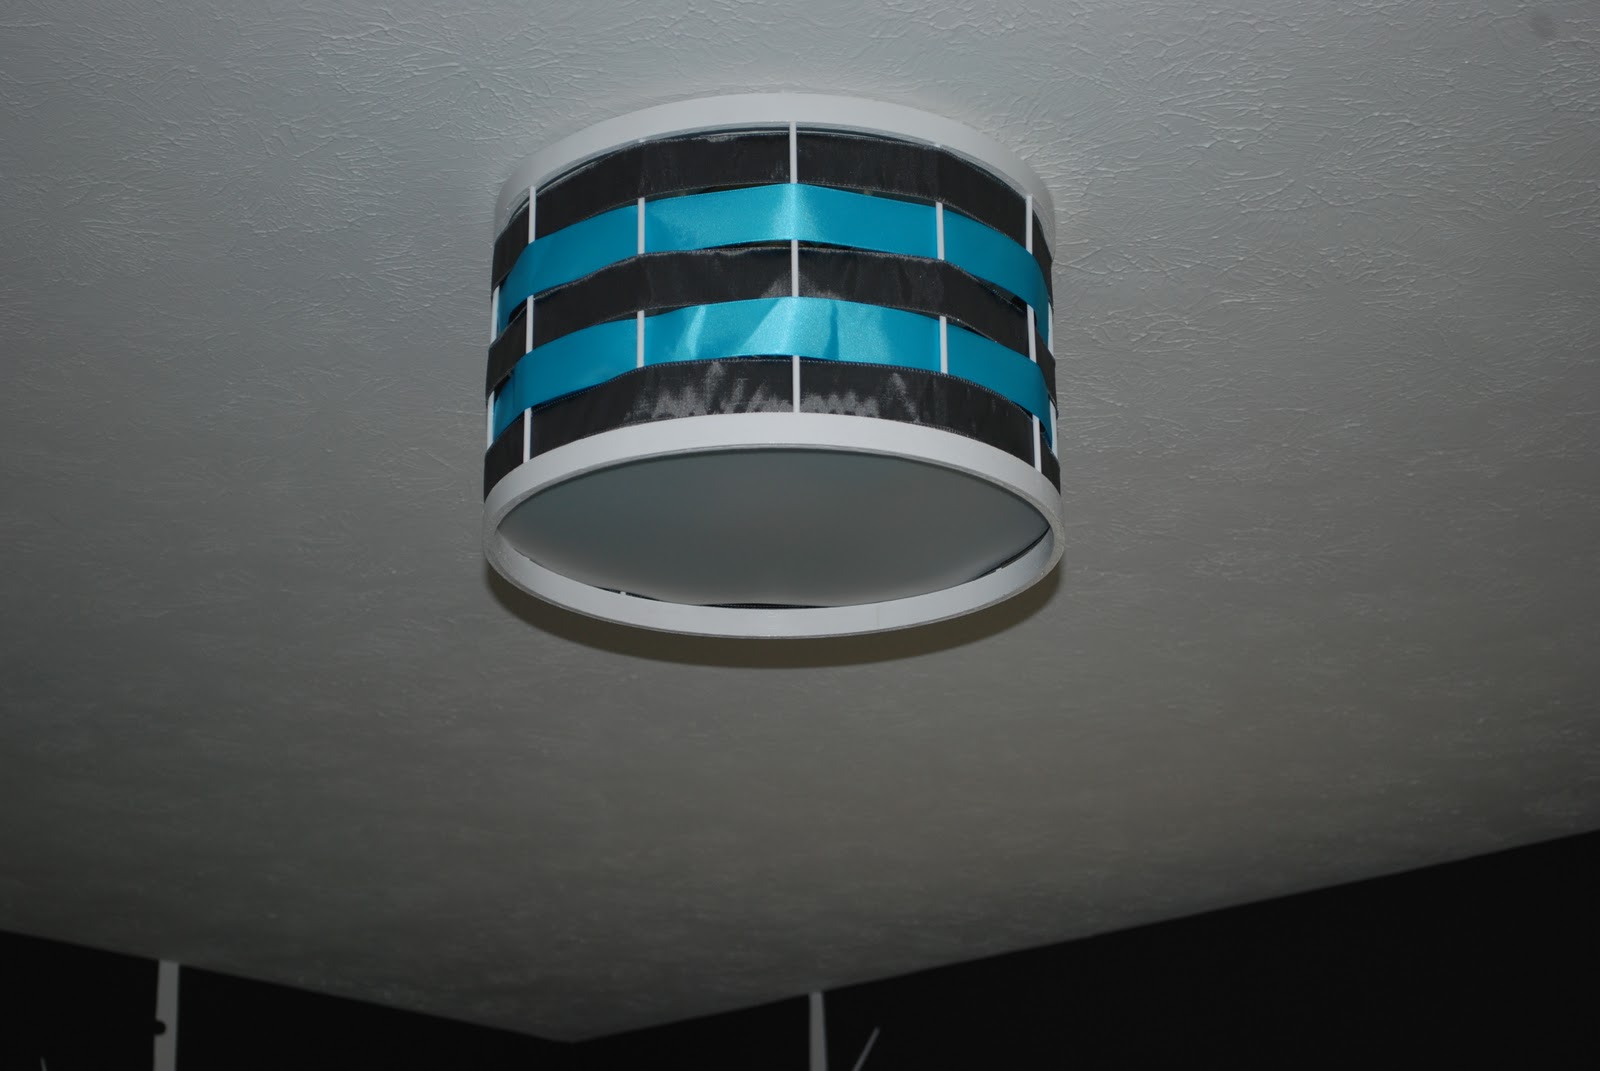
A frame that he made out of wood to look like a drum shell. Yes, he made the frame himself out of wood. I don't know how but he did. And yes, he plays the drums and actually makes custom drums from fiber glass. Yep, our little guy is destined to be a drummer. Not looking forward to all the noise but the thought does excite me since I've always wanted to play the drums!


We wove thick charcoal and turquoise ribbons through the drum, securing it with hot glue as we went along and then added a frosted circle to the bottom to diffuse the light from below. Voila! Instant light fixture!
The two shelves above the changing table I thought would be big/long enough to hold more photos of our immediate family than it did. They were filled up right away with books, stuffed animals and a only a few of the pictures/photos I wanted to use so I decided to do a photo collage of frames to the right of the the baby's crib, each featuring an immediate family member. I figure when he's older we can do the point and ask game there, you know the- "who's that" and "who's that" game.


(These frames are driving me nuts! Most of them are hung on a single nail so even though I obsessively level them every time I walk in the room they all seem to move a little over time. I need to get those non-slip corner thingys for them to keep them in place!)
The mobile was a random last minute craft that I threw together one afternoon after I organized all my fabric and craft supplies in the office. I had everything I needed and didn't spend one cent on anything. First I cut out the pattern for the bird body, beak and wings, traced them onto felt, cut them out and then hot glued the beaks and wings to the bird bodies. Then using embroidery floss I blanket stitched around each of the birds to secure the two sides together, stuffed them with some left over batting I had and closed them up. The black wooden oval they're hanging from is a bag handle that didn't get used from a different project. I used one strand of embroidery floss to attach each of the birds to the oval and used the rest of the remaining floss to hang the mobile up.

Painting the graphic on the walls by far took the longest time to do. Here are step by step photos of the progression of the walls:
Once we decided on what we were going to do we had to figure out how to get it on the walls. No small task since I don't consider myself an artist at all. Sure I'm crafty but that's so different from being able to draw and paint. I was going to free hand the trees at first, just wing it ya know but Dave said "No Way!" and suggested that I tape in the outline of the trees. I really didn't think this was going to work because I thought the trees would end up looking too straight and un-natural, like obvious blue masking tape trees.
I gave it a go though, just to get a visual. The first tree I taped in ended up being too short and too thick, a tendency that I would do to all the trees until I stepped back and realized they were too thick and "thinned" them out. After the first two trees I pretty much got the hang of it and the rest went fairly quickly.

Dave painted them in and an hour or two later we pulled the tape to reveal our cool little trees!


Next I hand painted the leaves onto the trees. Again, I was super nervous, not wanting to mess up our so far perfect mural but after taking forever to paint a few of them I just snapped back into my old self and just "winged it", just painting different leaf shapes and re-shaping them if they were a little off.

Feeling confident after my successful leaf painting stint I tried my hand at drawing templates for the birds. Here is where my streak ended. After an hour of trying to free hand draw the birds and coming up with some pretty funky, disproportionate birds I gave up and asked Dave to give it a shot. Thirty minutes later he walks into the room with 5 different birds, all perfectly to scale! Who knew he could draw! :)

We taped the templates to the wall, traced around them and then filled them in with our turquoise accent color. The trees, leaves and birds all required three to four coats of paint to cover over the dark charcoal paint.
So that's it! Little baby Martin's nursery in a not so little nutshell. It was fun putting it together and feels good that we took the time and put in the effort to hand make everything we did- all for our beloved little one! :)


